Does Creating a Pom File Allow You to Upload App to Maven Repository
This browser is no longer supported.
Upgrade to Microsoft Edge to take reward of the latest features, security updates, and technical back up.
Get started with Maven feeds and Artifacts
Azure DevOps Services | Azure DevOps Server 2020 | Azure DevOps Server 2019 | TFS 2018
This quickstart volition guide you through setting up Maven to publish and consume Artifacts from your feed.
This guide assumes you've already set up Azure Artifacts. Meet Kickoff using Azure Artifacts to learn how to license the extension.
Notation
Azure Artifacts is an extension that comes pre-installed in TFS 2017 or newer (Maven is simply available in 2018 or newer), if it was removed from your system, you can install it from the Visual studio marketplace.
Prerequisites
-
Apache Maven installed. You can download it from the Apache Maven project.
-
Accept Azure Artifacts installed in your organization.
Create a feed
Already take a feed? Skip to the next step.
-
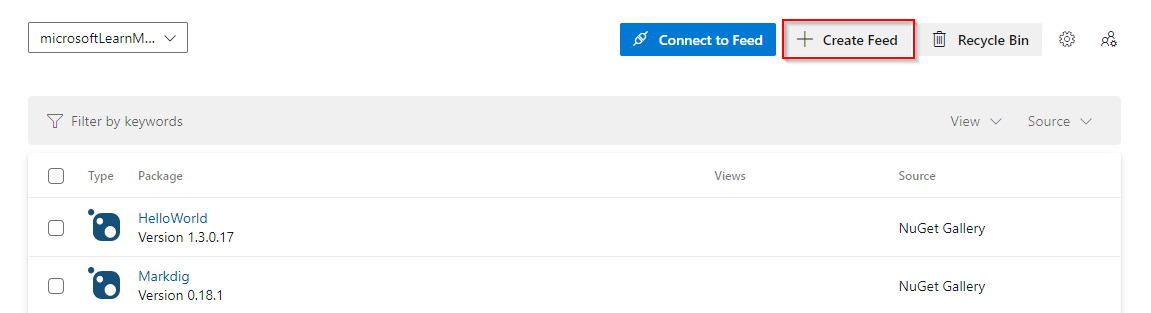
Select Artifacts.

-
Select Create Feed.
-
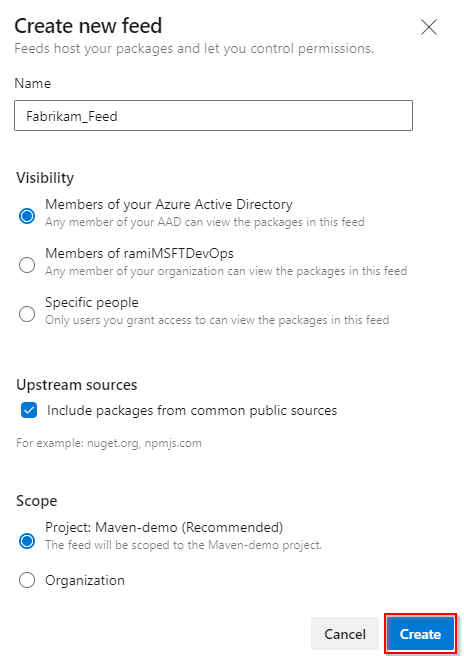
Requite your feed a Name and cull its visibility, upstream sources, and scope settings.
-
Select Create when you are done.
Azure Artifacts is installed past default for TFS 2017 customers. You must upgrade to TFS 2017 in order to use Azure Artifacts. If this is the beginning time using your feed, you lot might be asked to assign a license
-
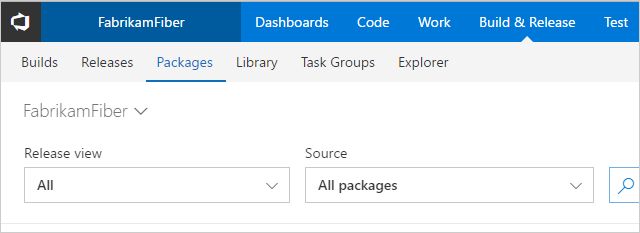
Go to Build & Release and select Packages.
-
Select + New feed.

-
Give your feed a Proper noun, a Description, and set up who tin can read, who can contribute and if you desire to Include external packages.

-
Select Create when you are done.
Fix up hallmark
-
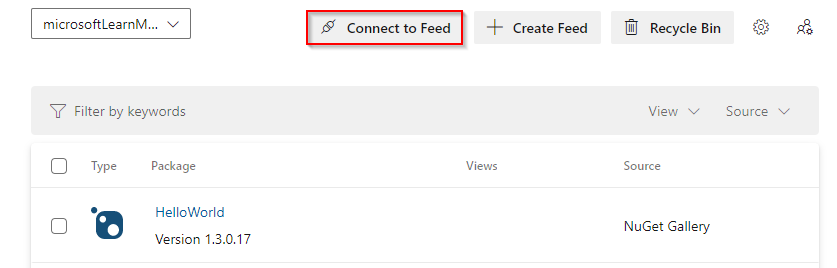
Select Artifacts, and then select Connect to Feed.
-
Select Packages, then select Connect to Feed.

-
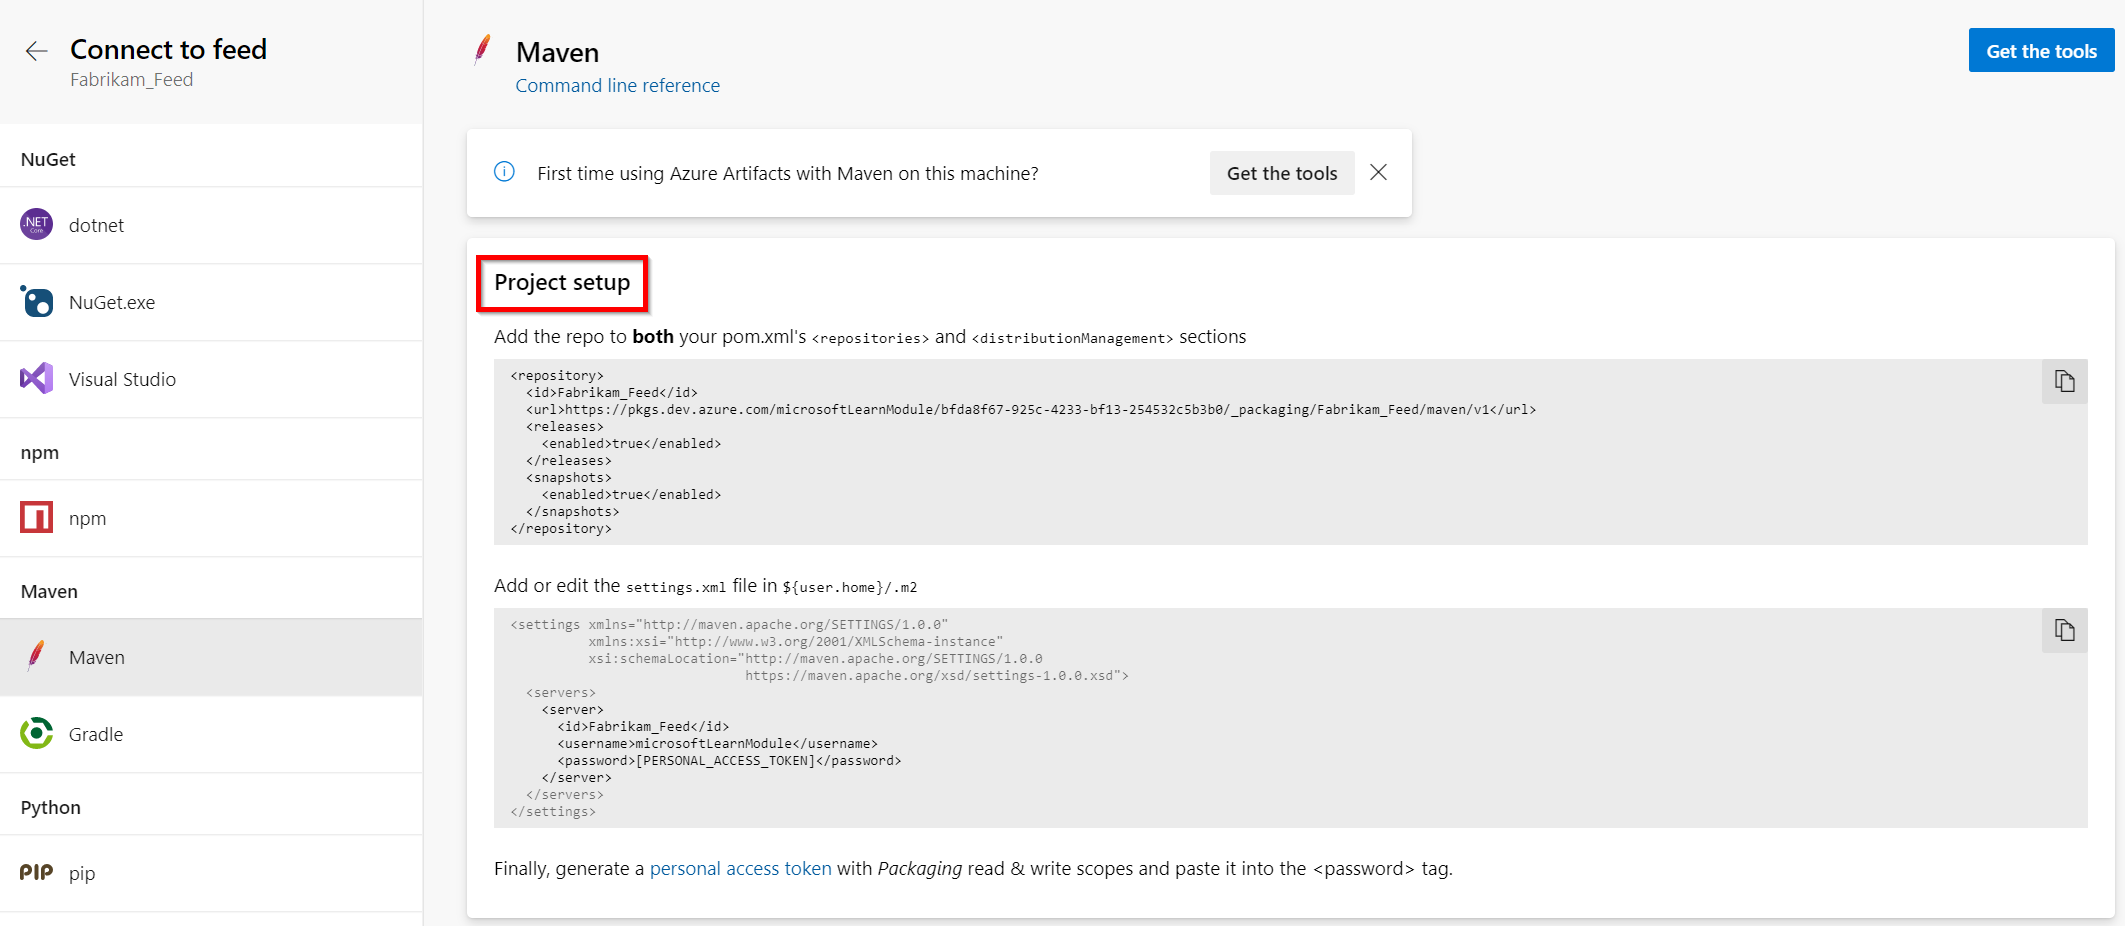
Select Maven.
-
If this is the outset time using Azure Artifacts with Maven, select Become the tools to download and install Maven.
-
Follow the Project setup instructions to gear up up your project.
Publish an artifact
To publish a Maven artifact to your feed, follow these steps:
-
If you don't have a Maven parcel, you can create 1 by running the following command:
mvn -B classic:generate -DarchetypeGroupId="org.apache.maven.archetypes" -DgroupId="MyGroup" -DartifactId="myFirstApp"If y'all get the following error You must specify a valid lifecycle stage or a goal (..) after executing the previous control, follow these steps to add a goal in your run configuration:
Right click on your project, select Run as then Maven Build. Enter package in the Goals text box, and then select Run.
-
Set up the Maven client with your feed.
-
Navigate to the directory of your pom.xml file. By default, the pom.xml file is at root path of the project.
-
Run the post-obit commands to build and deploy your Maven antiquity:
- Build your package:
mvn build - Deploy your package:
mvn deploy
- Build your package:
If y'all get the following error Unknown lifecycle phase "build" when y'all run mvn build, you can utilise M2Eclipse to build your maven projection.
-
Right click on your project.
-
Select Run as, then select Maven Build....
-
Write package in the Goals text box.
-
Select Run.

If you desire to publish a third-party artifact, you can use the deploy:deploy-file mojo. This can be used with or without a POM file to deploy your packages.
mvn deploy:deploy-file -Dpackaging="jar" -DrepositoryId="MyFeedName" -Durl="MyFeedURL" -DgroupId="MyGroup" -DartifactId="myFirstApp" -Dversion="jarFileVersion" -Dfile="jarFileLocalPath" Note
You can store up to 30 Maven snapshots in your feed. Once you reach the maximum limit, Azure Artifacts volition automatically delete snapshots down to 25. This procedure will be triggered automatically every time 30+ snapshots are published to your feed. See Handling Maven snapshots for more than details.
Notation
Maven snapshots are not supported in upstream sources.
Important
In order to automatically cosign with your Maven feed, y'all must set up the mavenAuthenticateFeed statement to truthful in the Maven task.
Install an antiquity from your feed
Install Maven artifacts from your feed by using the Maven client.
The most mutual way to install a Maven artifact is as a dependency of some other antiquity.
-
Create a Maven artifact by using the following command:
mvn -B archetype:generate -DarchetypeGroupId="org.apache.maven.archetypes" -DgroupId="MyGroup" -DartifactId="mySecondApp" -
In Azure Artifacts, browse to the artifact that you want to install and copy the contents of the
<dependency>element. -
Paste the
<dependency>element content inside the<dependencies>element of your pom.xml file. -
Run
mvn installfrom the directory that contains your pom.xml file.
Encounter the Maven CLI docs for more installation options.
-
Create a Maven antiquity by using the following command:
mvn -B classic:generate -DarchetypeGroupId="org.apache.maven.archetypes" -DgroupId="MyGroup" -DartifactId="mySecondApp" -
From the Connect to feed dialog box in TFS, copy the
<repository>information. Paste it into your pom.xml file twice (run across the preceding sample file):- Betwixt the
<repositories>tags - Between the
<distributionManagement>tags
- Betwixt the
-
From the Packages page, browse to the artifact that you lot want to install and copy the contents of the
<dependency>element. -
Paste the
<dependency>element content inside the<dependencies>element of your pom.xml file. -
Run
mvn installfrom the directory that contains your pom.xml file.
Meet the Maven CLI docs for more than installation options.
Feedback
Submit and view feedback for
Source: https://docs.microsoft.com/en-us/azure/devops/artifacts/get-started-maven
0 Response to "Does Creating a Pom File Allow You to Upload App to Maven Repository"
Post a Comment